05
Mar 08

Overbrew! brewverflow?

Overbrew! brewverflow?

Posting form my phone is a little annoying – but it’s better than nothing. The text above was all I sent – but I had to remove 3 paragraphs of drivel that Verizon felt they needed to add. And of course being a phone it’s hard to enter much of a message.

The cause for such spur the moment updating however is our critical capacity on homebrew. The Yuma Brewers have been busy this year even if we haven’t been updating our old blog! Matt’s fridge is at capacity – plus J has some kegs at his house in his new converted freezer. Mark found us a pile of new kegs and Rich just got a used fridge for $10. And don’t forget my own cooler project.

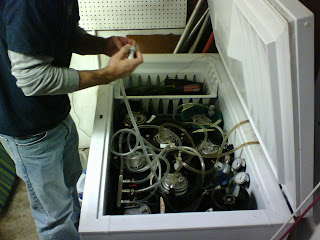
Matts freezer/fridge above is holding 7 kegs and a 20lb CO2 bottle, we could move the CO2 out to make room for one more keg…but he’s basically at capacity. We did finish one of those last Wednesday, and one will be coming over here tomorrow for my birthday party. Thanks to Tommy we’ll also be tapping tomorrows beer with Nitrogen which will be an exciting experiment. But we’ve got more waiting to go into kegs so it’s a good thing more homes for them are becoming available!
01
Mar 08

Crazy project update (Take 2)

Hmmm, didn’t get any images with that. Apparently Picasa’s blogging features still have some issues even if you stick to their <=4 images rule. So here goes again:

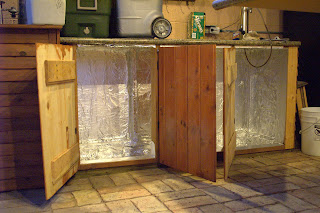
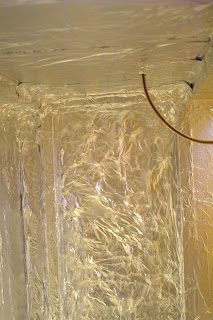
Well, with my dad posting his much anticipated big reveal – I figure it’s time for me go to the other direction and post an incremental update on my latest crazy project. Namely the conversion of our back cabinet into a beer/whine fridge. When I last blogged about this I left the insulation specifics somewhat up in the air. Since then I’ve spoken to our resident refrigeration expert and decided on my final plan of attack (Well for everything except the doors. The first layer will be aluminum foil to act as a reflective heat barrier and somewhat as a moisture barrier. After that will be a layer of plastic to make sure I’ve got a good external moisture barrier. I’ve been working on layer one since before my last post about this, but it was just today that I finished it:

While I do expect the aluminum to help as a moisture barrier…I didn’t go crazy making sure it was 100% airtight since I still have the plastic layer (and a few other layers) coming. I did use 3M Super 77 spray glue to bond the aluminum to the walls and itself so even where it appears there are gaps usually there’s a layer underneath and it is all sealed at some point. Lines for more serving taps will require more holes in the future…but for now I just want to keep the holes as small as possible even though my tap is insulated inside.

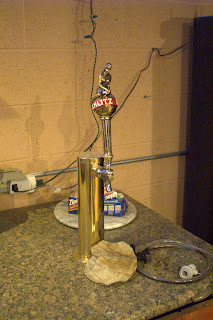
Oh yeah, I also picked up some Brasso and cleaned the tap tower back up again. It had gotten real nasty looking living outside as long as it had without being cleaned. And I picked up some vintage tap handles cheap on ebay…well most were cheap. This one I paid a bit much for..but I just had to have it to go with my Schlitz ball and in memory of many a happily wasted evening at the union. Goes rather nice with the brass tower I think!

So layer one is finished. Tomorrow I’ll try and do layer 2 – the plastic moisture barrier. Once that’s up layers 3 and 4 should go quick and easy since I have them on hand…but just what they are I think I’ll leave up to the imagination for now.

Posted by Picasa