Last sunday while we were recovering from the previous nights party, Amy and I remembered about the Yuma Bargain Warehouse and decided to go see if we could find a new tarp for the carport. I had guestimated that it would be a 20′ x 20′ tarp…and after measuring the tattered rempains of the original that was looking about right. At the warehouse we found a good selection of tarps, of course the one we liked best (green mesh) they were out of in 20′ x 20′. But they had black mesh, heavy duty white and silver in that size. The black mesh was tempting…but being a mesh we weren’t sure if it would give as much shade as we wanted – and it was over double the cost of a silver or white tarp. The silver we didn’t like the looks of so at $37 the white tarp won out. We also picked up 2 – $2 bundles of nylon rope and headed home. Last night we finally put the tarp up, took a little over 30 minutes. Continue reading →
house
01
Mar 08
Crazy project update (Take 2)
Hmmm, didn’t get any images with that. Apparently Picasa’s blogging features still have some issues even if you stick to their <=4 images rule. So here goes again:
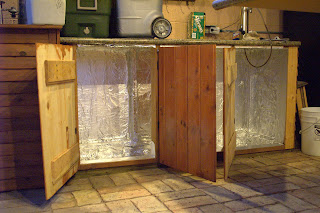
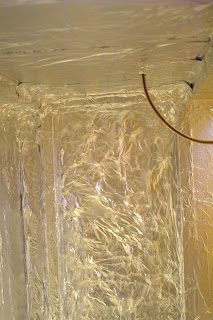
Well, with my dad posting his much anticipated big reveal – I figure it’s time for me go to the other direction and post an incremental update on my latest crazy project. Namely the conversion of our back cabinet into a beer/whine fridge. When I last blogged about this I left the insulation specifics somewhat up in the air. Since then I’ve spoken to our resident refrigeration expert and decided on my final plan of attack (Well for everything except the doors. The first layer will be aluminum foil to act as a reflective heat barrier and somewhat as a moisture barrier. After that will be a layer of plastic to make sure I’ve got a good external moisture barrier. I’ve been working on layer one since before my last post about this, but it was just today that I finished it:

While I do expect the aluminum to help as a moisture barrier…I didn’t go crazy making sure it was 100% airtight since I still have the plastic layer (and a few other layers) coming. I did use 3M Super 77 spray glue to bond the aluminum to the walls and itself so even where it appears there are gaps usually there’s a layer underneath and it is all sealed at some point. Lines for more serving taps will require more holes in the future…but for now I just want to keep the holes as small as possible even though my tap is insulated inside.

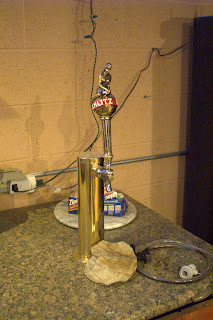
Oh yeah, I also picked up some Brasso and cleaned the tap tower back up again. It had gotten real nasty looking living outside as long as it had without being cleaned. And I picked up some vintage tap handles cheap on ebay…well most were cheap. This one I paid a bit much for..but I just had to have it to go with my Schlitz ball and in memory of many a happily wasted evening at the union. Goes rather nice with the brass tower I think!

So layer one is finished. Tomorrow I’ll try and do layer 2 – the plastic moisture barrier. Once that’s up layers 3 and 4 should go quick and easy since I have them on hand…but just what they are I think I’ll leave up to the imagination for now.
10
Feb 08
Untitled
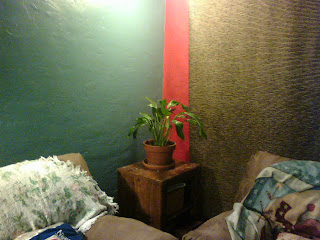
Trying out the whole posting from a phone thing. This is a little snap from my cellphone of this weekends project. Unfortunately the cell phone camera completely destroys the whole point which was to show off the new paint colors in the living room. But due to the lousy color rendition in the cell phone the new blue wall looks like the old green color! The red is kind of far off as well.
So I guess I’ll have to break out the real camera for some comparison shots tomorrow.
Here’s the original view of the living room in the colors that were there when we moved in:


