The screen never fit right in our dining room window, so I figured we should replace it. Read more for the photos.
walls
18
Feb 08
More painting
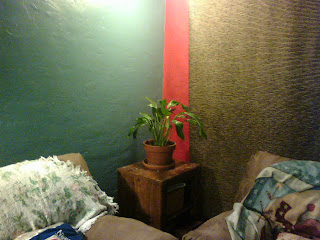
Ok, the cell phone didn’t do a very good job earlier…and now I know that even a good camera isn’t going to make this very easy. Until I dig out one of my grey cards It’s going to be up to you to use your imagination as to how our living room looks. Despite knowing the temperature of our light bulbs (I’ve put warm 2800k CFL’s into almost every fixture, the fan lights are off since they don’t match) I still had a hard time getting the white ballance correct on my camera…and the JPG conversion – I need to find time to process the RAW’s to get these colors accurate. The first one is closest to reality – though the red isn’t really that intense. Even so we’ve decided on a replacement that is more in line with the existing green wall and this new blue.
BTW – when I worked in a one hour photo lab I used to HATE people who would bring in photos like this. If you never saw the scene it’s real hard to tell what the color should be like! The only mainipulation on these photos was done entirely in-camera. The poor camera in this case is faced with the same issues I had to deal with manually choosing color corrections for a roll of film that I had no baseline for. It’s a lot easier to fix now with photoshop than it was with heavy correction filters and multiple attempts (each wasting paper and chemicals) but it’s still tough to make the final call.
When we get the new red and re-paint I’ll take some better full living room shots to show off the changes. No photos of the 3rd bedroom yet…I dug in yesterday before Amy got home and with about 4 hours spent between the two of us it’s starting to take form. Still a mostly disorganized pile of boxes…but it’s about half as big of a pile as it was before! There are also 3 bookcases and 2 desks setup already.
I also have a project in the backyard that I’m working on. That will have to wait for another post. I’m experimenting with using Picasa to ease including photos…but I’m not big on it yet. I recently had to move my hitesman.com domain from the provier it had been with for over a decade to one of the servers I administrate for MGM Internet Solutions. I’ve been meaning to do it for some time and an e-mail issue finally gave me the excuse to pull the plug. Now I have much more control over my domain and will be able to persue some other ideas with it again. But until then it’s looking like Picassa is ok for using one or two photos…but add more than that and they may not come through. It’s also easy to mess up the alignment and the generated HTML is pretty gnarly (I need to cut and paste into my editor to see if some hilighting will make it more tolerable to read.) The backyard project will have quite a few photos and I don’t want to break it into THAT many posts…
10
Feb 08
My darkroom
Well, since it was my dad mentioning my old darkroom that spurred me into finally creating a blog I suppose it would be a decent place to start from. I built my darkroom in … I believe it was the summer of 1988.
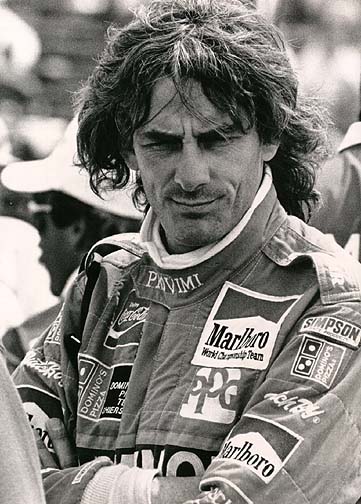
Correction. It must have been 1990 as it appears that was the year that Danny Sullivan won the Cleveland Grand Prix. The film I shot there (while my dad was rushed to the hospital for an emergency appendectomy) was the first I developed after getting my enlarger. One of the first shots I printed was of Danny Sullivan just before the race when I happened to get a few frames of him. I’ll have to try and dig those up and scan them sometime. The one shot I liked best from that weekend has been on my website for about as long as I’ve had a website and was of Arie Luyendyke, who got 5th in the CART race but went on to take 1st at the Indy 500 that year.
My dad helped a lot more than he lets on in helping me with the darkroom. He may not have been able to physically help with erecting the walls, sweating the plumbing fittings, wiring the room or even the drywall at the time I built it. But he had helped me plan the project and more importantly had involved me in enough projects before that I already had first hand experience with most of the skills I needed. The one part of the job the could have helped with but didn’t was the original cleanup. That was the price I had to pay for building in his basement – it was up to me to make room and keep the darkroom area cleaner that it was before I started.
These first shots were after I had already cleaned out most of the corner to try and help convince my dad that I was serious.
Once I had the OK and had bought the first load of lumber I cleaned the corner out completely and started to build:
Going to look into better ways of linking my photos (better as in easier for me when posting!) then come back and post the inside shots along with some of it a little later after being in steady use for awhile.
10
Feb 08
Untitled
Trying out the whole posting from a phone thing. This is a little snap from my cellphone of this weekends project. Unfortunately the cell phone camera completely destroys the whole point which was to show off the new paint colors in the living room. But due to the lousy color rendition in the cell phone the new blue wall looks like the old green color! The red is kind of far off as well.
So I guess I’ll have to break out the real camera for some comparison shots tomorrow.
Here’s the original view of the living room in the colors that were there when we moved in:


